Why Don’t Gas Grills Use Lava Rock Anymore?

If you’ve heard of lava rocks for gas grills or gas grill rocks, you may be wondering why don’t gas grills use lava rock anymore?

Lava rock for grills and fire pits. why don't gas grills use lava rock anymore

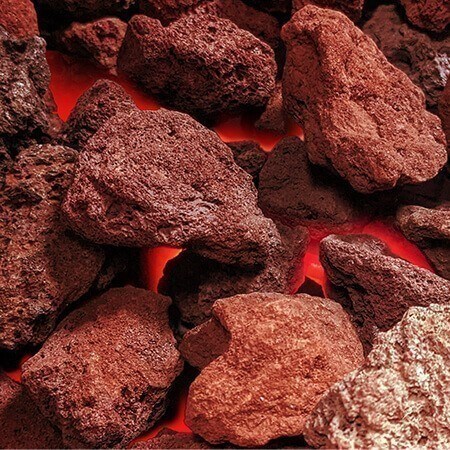
These naturally occurring volcanic rocks are perfect at withstanding and holding large amounts of heat. Because they’re porous and made of volcanic material, they also diffuse the heat evenly. Lava rock creates a perfect heat trap for the flame of a gas grill and radiates the heat as infrared energy to cook your food. So why don’t gas grills use lava rock anymore?

Why Don’t Gas Grills Use Lava Rock Anymore?

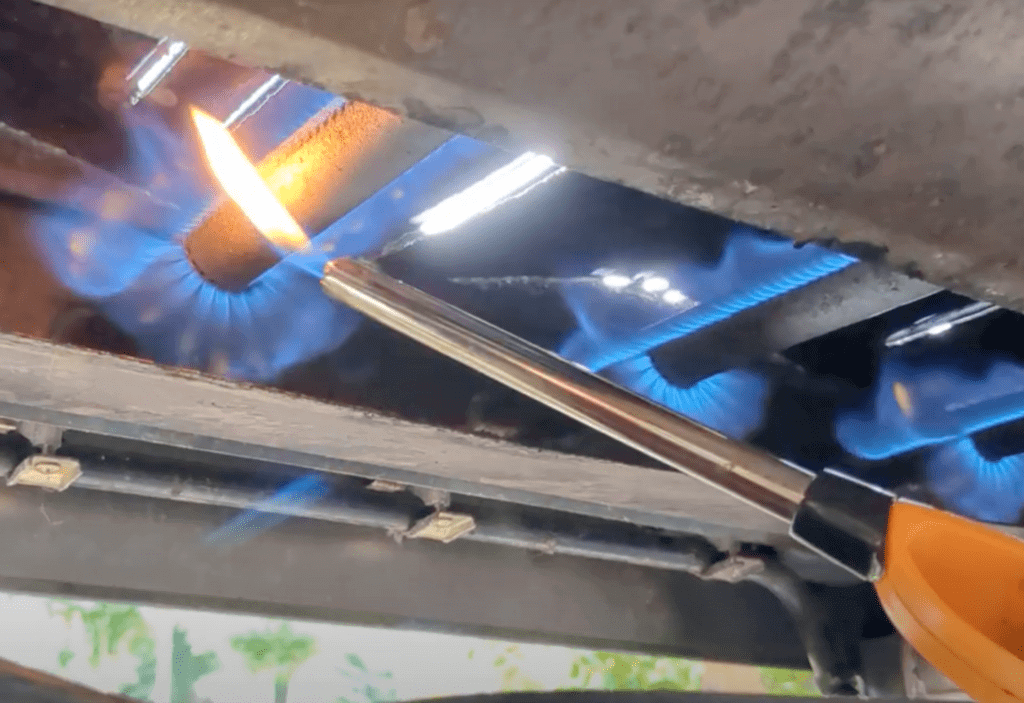
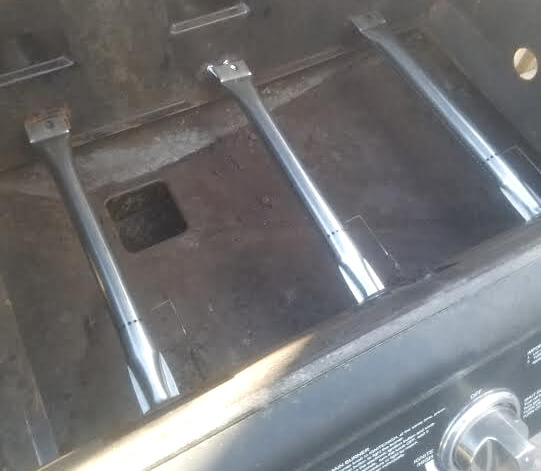
In every single gas grill there’s a gas burner. The burner produces a flame that produces heat to cook your food. However, heat rises and dissipates in the air too easily to cook your food if it isn’t trapped. An uncovered flame results in uneven or inadequate heat for effective cooking.

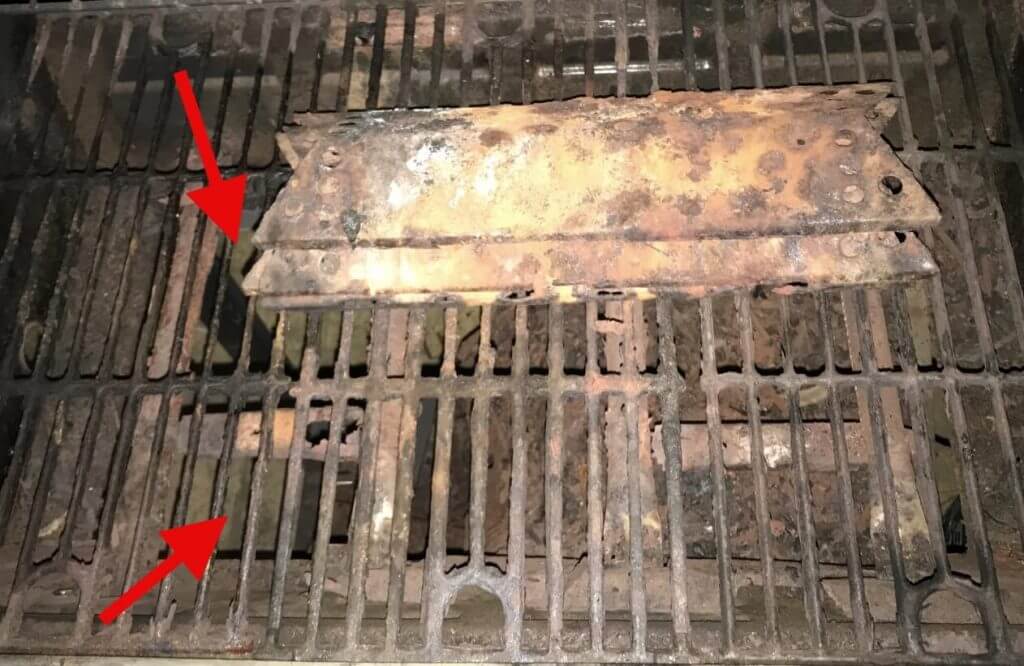
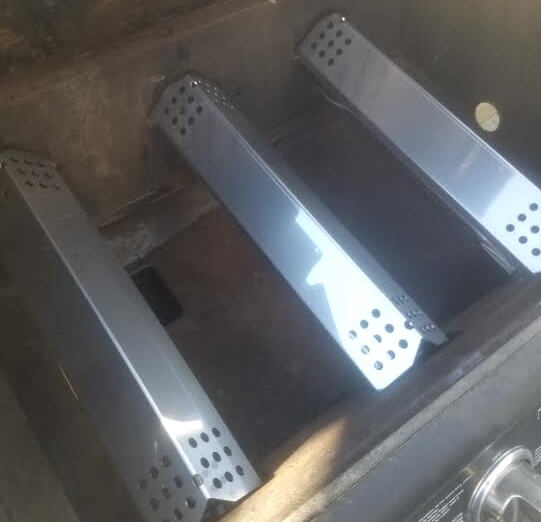
This is why grill manufacturers cover the burners in gas grills, but before they started using little metal plates, gas grills used to cover the burners with natural lava rock. 

Original gas grills used lava rock with the gas supplying the combustion for heat beneath a layer of lava rocks. The lava rocks themselves sat on grates, called lava rock grates or briquette grates.

The Advantages of Lava Rocks for Gas Grills

Lava rock naturally radiates infrared heat into your food when heated by the flame from your gas grill burner. That radiated heat cooks your food more evenly and leaves it simmering delightfully in the even glow of the lava rock bed.

Lava rock also retains heat on cold and windy days. It stays warmer for longer than metal plates for your gas grill do, instead of losing heat each time the grill cabin is opened.

Grillers who use lava rock lay them out on a metal grate fitted to their grill for lava rock, placing all the largest rocks in neat rows over the burners first and around the outside of the grill, then filling in the spaces between them with an even scattering of the smaller lava rocks for gas grills. See this video for a visual!

The Big Box Retailers Import Cheap Mentality

So why don’t gas grills use lava rock anymore?

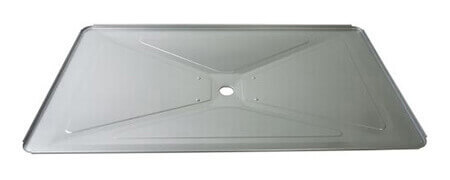
Many years back, the gas grill segment bought into big box retailer mentality of marketing. We saw the cheapest mass-produced assemblies imported from foreign manufacturers. 

Shipping 3 to 5 pieces of bent sheet metal in neatly standardized packaging from an overseas assembly line for the grill saved the grill manufacturers time, hassle, and money over sourcing volcanic lava rock. Not all lava rock is the same. For gas grills you need suitable size and quality for cooking. Additionally, the manufacturers no longer needed to provide the grate where the lava rock sat. They exchanged a higher quality product and experience for a cheaper solution on their end. 

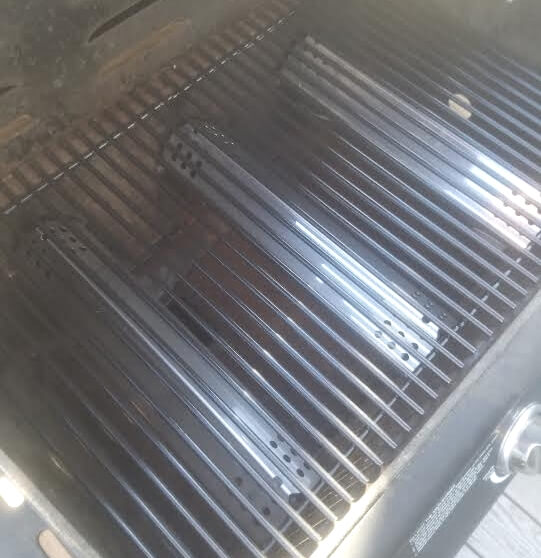
So the metal burner covers won out in the industry, and slick ad copy campaigns touting the superiority of metal plates got the consumer to go along with the change.

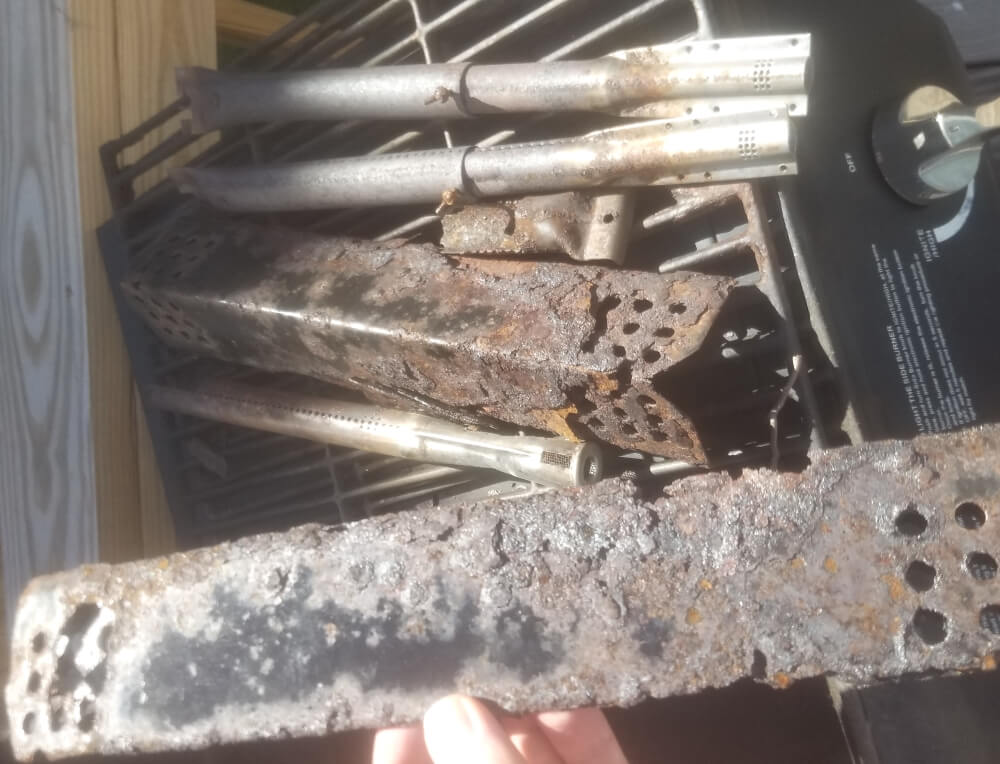
But these are lower quality burner covers for gas grills. They’re not nearly as nice as lava rock. They don’t hold and distribute the heat from your gas burner as well as lava and the rocks look good and are more fun to barbecue over.

So why doesn’t your gas grill use lava rock?

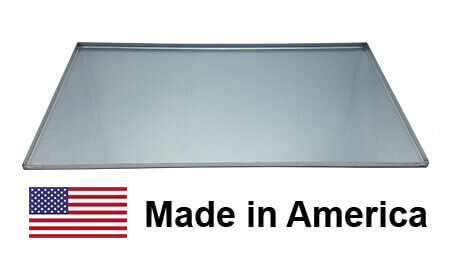
You can get lava rock for your grill!

At this time, we have an exact-fit kit for some Weber Models. Check for availability for your grill! We are working to develop more exact fit solutions. In the meantime, browse our selection of grates that can hold up lava rock in your grill.

Questions? Let us know in the comments or send us an email [email protected]

What If The Grill Doesn’t Light?

What to do if your gas grill doesn’t light but it’s time to party!

Is your gas grill ignition button not working? Is the grill igniter clicking but not lighting? No worries and no need to cancel that party or BBQ dinner– you can safely light your grill even if the ignition system in your grill isn’t working!  Use a long-stemmed lighter to light each burner one by one. Just be sure to do it safely by following these steps.

If your ignition is not working, you can still light your gas grill using a lighter. A gas grill ignition malfunction is no reason why you shouldn’t be barbecuing burgers, hot dogs, shish kabobs, or whatever you and your family and friends enjoy today!

If you’re looking to repair or replace your gas grill ignition system, check out our vast list of ignitor parts or get in contact with one of our grill experts to help troubleshoot your problem!

What To Do If The Grill Doesn't Light

1. A Long Stemmed Lighter Is Safer to Light A Gas Grill

You don’t have to be a hero to be a hero. 

For safety’s sake use a long stemmed lighter for candles, fireplaces, and grills, like a BIC Multi-Purpose Classic Edition Candle Lighter with the long metal wand. That way you don’t have to put your hand and half your arm into the grill to light the flammable gas from your grill’s tank.

The great thing about this solution is how accessible it is. If you’ve got a suitable lighter on hand, then use that, but if not, you won’t have to wait around for a new grill part to get dinner ready. A quick run to the convenience store will save the day. 

2. Turn The Burners on One at A Time to Light Them

If the ignition for one burner isn’t working, in most cases grillers find that they aren’t working for the other ones either.

Always begin by opening your gas grill lid. This will help to allow gas from the tank to dissipate in the air. If gas builds up in the grill chamber before you go to light it, there is a risk of injury from a flare up.

Turn the first burner on and put the tip of the lighter next to the burner keeping your hand. Additionally, keep the rest of your person and anything flammable away. Be careful as you use the lighter to let them, and be sure to turn on and light each burner one-at-a-time to avoid gas buildup in your grill.

3. If The Gas Grill Burner Doesn’t Light on Your First Try…

There might be something more than the gas igniter that’s off. It may be that your fuel tank is low or the hose or some connection in your setup is failing. Before you look for the issue and go to replace any of your grill parts, you may want to try again and see if you can get it to light.

If you try to light your grill again, just be sure to leave the grill lid open and let the chamber air out some before making another attempt with your long-stemmed candle lighter.

Safety Note to Grillers: Your safety is your responsibility. Never use a gas grill indoors. Always light your grill with the hood open. If you smell gas, or have trouble lighting your grill, turn off all gas sources and wait 15 minutes before trying again.

Watch Grill Parts Girl explain it instead on our youtube channel!

If you have more questions, leave us a comment! Or, take a minute to go visit our Youtube channel and learn more about your grill. We would love to connect with you there!

Happy Grilling!
-The Grill Parts Girl

What’s the Deal with Stainless Steel?

Original Publish Date 02-15-2013

stainless steel

There’s a lot of disappointment floating around when it comes to one material currently on the market: stainless steel.

The two main issues are:
1) Why does my “stainless steel” rust?
2) Why is my “stainless steel” magnetic?

I put stainless steel in quotation marks because that’s how most people would phrase the questions. If either of the two above things were accurate, our customers would believe their item must not be stainless steel…

Right?

No, actually that’s not correct. There are different grades of stainless steel and they all act differently when introduced to either heat or water. In our grilling cases, that would be BOTH!!!

To clear it up, the General Manager at GrillPartsSearch.com has written up a guest blog explanation.

Take it away Will!!!

There are two general series of stainless steel grades used in the gas grill industry: 300 series and 400 series.

The 300 series group of alloys are non-magnetic and the basic 300 alloy contains 18% chromium and 8% nickel.
The 400 Series group of alloys are magnetic and the basic 400 alloy contains 11% chromium and 1% manganese. This series offers a much lower cost option in stainless steel parts.
-The 300 series is subject to corrosion at crevice points, while the 400 series has a considerably lower resistance to corrosion in general.

Knowing that, we choose the parts we sell to our customers very carefully! We try to gain as much information as possible about the grades of stainless steel we offer our customers so we can help them know what to expect from the parts they purchase.

Here’s how that information translates in grilling terms:

Cooking grids are exposed to more liquids and less heat, compared to other parts in a grill. In the case of cooking grids, the extra expense of the 300 series can be worth it. 300 series stainless is less prone to rust but the less than ideal conditions inside a grill will definitely degrade even the highest quality stainless steel. 304 is the most common type of stainless steel in the world, while 316 is generally the highest grade stainless you will find in ordinary applications, and both will degrade in a grill. While we used to carry a limited few grids made from 316 series stainless steel, manufacturers of grill parts worldwide have slowly removed these offerings from their lines of parts. We no longer have any 316 series grids, but carry multiple 304 series grids. You can check them out here and view by material type.

As for burners and heat plates, they certainly are exposed to moisture but are exposed to much more heat.

Heat is just as much of an enemy to steel, if not more so, as moisture and oxygen. Heating and cooling are used in the production of metals to actually change the chemical/molecular bonds and subsequent performance of the metal. It is no different inside your grill. While 300 series stainless will technically last longer than a 400 series plate of equal thickness, the benefit is only marginal. That marginal benefit compared to the substantial increase in cost doesn’t really pay off. We have found by spending a little more to make the plate out of a thicker 400 series stainless, you gain close to the same amount of life you would get out of a 300 series product at a fraction of the cost.

If you ever have any other questions about stainless steel or the applications of such in your grill, we’d love to help!

Just give reach out via email [email protected], phone 678-272-2451, or this helpful form!!!

Thanks so much Will!!!

That’s all for now,

Happy Friday!

-GG

Photo by Yender Fonseca from Pexels

Visit GrillPartsSearch.com’s profile on Pinterest.

What is a Drip/Grease Tray/Pan? Where can I get one?

What is the bottom part of the grill called?

The bottom of the grill is called a grease tray / drip pan. It is a separate part in some grills that catches the grease and drippings from the delicious food you cook on your gas grill. If you have a little cup that catches all the grease, that is called a grease cup and count yourself lucky. They are easier to empty, clean and replace than an entire grease tray.

What is the bottom part of the grill called?

Example of a Grease Tray / Drip Pan

After a few years of use, a lot of grill owners find the grease tray / drip pan is rusting and failing to do its job. This results in greasy gas tanks and become a fire hazard. So, what to do? Easy – replace it. Right?

HOW CAN I REPLACE THE GREASE TRAY / DRIP PAN?

To see if we have a grease tray / drip pan for your gas grill, visit GrillPartsSearch.com, 1. Enter in the brand and model of your grill. 2. Press GO.

We now have a number of styles available. This is because you called us and let us know what you needed! Our response was to inform our suppliers and get the parts made.

We sell a variety of drip trays for Dyna-Glo, Member’s Mark, Vermont Castings and more!

Dyna-Glo Drip Pans:

We have nine different Dyna-Glo grease trays. Find which size works for your gas grill.

SIZE SKU
15-1/4″ x 28-5/8″ GPDP70011
15-13/16″ x 26-7/8″ GPDP70012
15-3/8″ x 20″ GPDP10404
15-3/8″ x 33-1/2″ GPDP70013
16″ x 26-1/8″ GPDP10604
16″ x 28-1/8″ GPDP10504
7-1/8″ x 19-1/4″ GPDP10204
7-1/8″ x 26-3/8″ GPDP11304
7-1/8″ x 30-3/8″ GPDP15304

Member’s Mark Drip Pans:

We have two different member’s mark grease trays:

Vermont Vastings Drip Pans:

We have four different vermont castings grease trays:

If you need a different part than the ones listed above or are in a jam, here’s our best suggestion: You MAY be able to line your original rusty grease tray with one of those aluminum baking pans from a local grocery store. The cost is low and they are easy to find and manipulate into place.

Good luck, and remember, if you need any burners, heat plate, cooking grids, accessories….contact us!

PHONE: We’re open 9:00 AM – 5:00 PM, Mon-Fri EST. Call (678) 272-2451
CHAT: On the bottom right window, chat with us online 9:00 AM – 5:00 PM, Mon-Fri EST
EMAIL: We’ll get back to you same or next business day.

Happy Grilling!!!

-GG

Gas Grill Grease Pans and Drip Trays

What Are Grease Pans and Drip Trays?

New Drip Pan Grease Tray grill part replacement. Material is Galvanized steel and the part is rectangular in shape. There is an American Flag and the Words "Made in America"
GrillPartsSearch.com Now Carries a Line of Replacement Drip Pans
https://grillpartssearch.com/category/GTDP.html

“Help! My bottom’s rusted out!”
You really do hear some pretty entertaining things working in the grill parts industry. Today we’re talking about your grease pan or drip tray.

In the gas grill industry, over the past 5-7 years, manufacturers introduced the concept of a grease pan / drip tray. A decade ago, most grills bodies consisted of just one piece with a hole in the bottom center where food grease dripped into a grease cup. Grillers easily removed the cup, dumped the contents and replaced it.

Then, grill companies moved to grill bodies made out of stainless steel sheet metal. So, they made grills where the bottoms of the grill were separate pieces. While some are riveted together, in most cases, you can remove these pieces. These trays are what we call “grease trays” or “drip pans.”

Why Do These Trays and Pans Rust Out So Quickly!?

Rusted Out Grill with Grid and Heat Plates Visible. Two red arrows point to a spot in the grill where the grease pan is rusted completely through. There is a hole in the grill.
It’s hard to see because this grill has so much rust, but the arrows are pointing to an area in the drip pan that is completely gone and you’re actually looking at the floor.

If you have a stainless steel gas grill, you know that all “stainless” is not created equal. When you grill, you have high heat and moisture in that stainless steel shell that makes up your gas grill. However, high heat plus moisture equals corrosion, even in stainless steel. As a result, you will commonly have a rusted pan or tray long before the rest of the grill rusts. We hear about it on a daily basis.

So What Can You Do?

Unfortunately, it can be very difficult to find a replacement for your grease pan. Manufacturers like Backyard Grill and Dyna-Glo are not in the replacement parts business. Consequently, even if they HAVE the tray you need, it can be very difficult or take a long time to get it. After-market parts companies often do not make replacement drip pans because the cost is so high.

This is why you have to look so hard to find replacement options for your gas grill drip pans and grease trays. However, this year we are proud to offer a trays that fit many models of Dyna-Glo Gas Grills. We have heard from customers some of our trays even fit Backyard Grills as well!

Before ordering a replacement pan, it is extremely important to take out your old pan and measure it.  
You will need the dimensions from front to back and left to right

GrillPartsSearch.com Now Carries a Line of Grease Tray / Drip Pan Replacements.

New Drip Pan Grease Tray grill part replacement. Material is Galvanized steel and the part is rectangular in shape. There is an American Flag and the Words "Made in America"

See our most popular Dyna-Glo Replacement here:
https://grillpartssearch.com/product/dyna-glo-drip-pan-grease-tray-galvanized-steel-15-1-4×28-5-8.html
Once again, please measure your original tray. We have many other sizes listed at the bottom of the product page.

New Drip Pan Grease Tray Liner grill part replacement. A set of four heavy-duty Aluminum pans, rectangular in shape. There is an American Flag and the Words "Made in America"

In addition to the USA-Made trays, we also have some aluminum drip pan liners. You can put these into your existing pan or new pan to extend the life of the part!
You can check those out here:
https://grillpartssearch.com/product/usa-made-medium-drip-pan-aluminum-4-ct.-16-x-11.html

New Drip Pan Grease Tray Liner grill part replacement. A set of three heavy-duty Aluminum pans, rectangular in shape. Include lip and are a replacement for Weber drip pans. There is an American Flag and the Words "Made in America"

Or, are you here for Weber replacement trays? We have those too!
https://grillpartssearch.com/product/weber-drip-pan-aluminum-3-ct-8-x-6.html

It is our goal to provide you with the parts you need. If you are looking for other grill parts, leave us a comment below!

Happy Grillin’! –Grill Girl

Nexgrill Grillmaster Before & After

Grill Girl Here! Today we have a special post inspired by one of our customers!

He purchased a Grill Master  grill made by Nexgrill off a craigslist ad for just $30! It needed almost all new parts and so he came to us. He purchased brand new burners, heat plates, and cooking grids and is cooking with an essentially new system! That is an awesome way to save some money and get a great grill on your back porch – not to mention the fact he kept this grill out of a land fill.

Burners, heat plates, cooking grids   Used Grill Master Burners Heat Plates Cooking Grids Nexgrill

In the pictures above you can see the old parts. There are rusted burners, heat plates and the old cooking grids. One of the burners had a big hole in it, so our customer decided to replace all three at the same time. You can also see that the heat plates were very rusty and the holes were starting to get bigger. These heat plates probably weren’t protecting the burners very well. Whenever one of our customers buys a used grill, I always suggest getting a brand new cooking grid. Who wants to cook on top of someone else’s old food? Yuck.

Grillmaster by Nexgrill Tube Burner BMGKTB1  Grillmaster by Nexgrill Heat plate GMNGHP1

Here are the new burners and heat plates. Don’t they look so great? Both of these parts are stainless steel and when they heat up for the first time, they will get some discoloration from the heat. Still, the both parts are an exact fit, plus the heat plates are fully stainless instead of the original porcelain coated steel plates that were in the grill. This is an example of how you really can upgrade your grill by purchasing new parts from us!

Grillmaster by Nexgrill new parts fixed

Here is the final shot of the grill before it was used for the first time. Lookin’ Good!

Congratulations on your rebuilt grill! We love helping customers do projects like this. Thanks for sending us the pics!

-GrillGirl

July Fourth Gas Grill Checklist

Are you grilling on a gas grill for the Fourth of July this weekend? Do this checklist TODAY:
1 – Remove and inspect the cooking grids and heat shields. Excessive rust or holes in these parts warrants replacing them!

Rust on the surface of your cooking grids, the area where you place your food, is gross at best. If you have a lot of rust or deterioration, get a new set! It’s amazing how a new cooking surface can affect your grilled food. Additionally, holes or excessive rust on the heat plates (heat shields, vap-o-riser bars, flavorizer bars, etc) can impact how the heat in your grill cooks your food. If you want an evenly heated grill, you need to have this system in good working order!

2 – Check the level of propane in your tank. Nothing dampens a party like running out of fuel.

You know you don’t want to have to leave your party to search for a new gas tank so you can finish cooking everyone’s food! If you have your grill hooked up to natural gas, of course this doesn’t apply to you. It’s easy to check the level of gas in your LP tank. Get some warm water and pour it over one side of the tank. The fuel inside will absorb the heat from the water, so when you run your hand down the side of the tank, it will feel warm and then cool. Wherever the tank starts feeling cool, that’s where your fuel level is. If it’s close to the bottom, go ahead and pick up an extra tank before your party!

3  – Before you put the other parts back in, visually inspect your burners (without removing them). Light them up using your ignition system. Are they burning evenly? Is the flame blue at the base?

You’ll want to make sure you don’t have any large holes or ares of flame coming out of your burners. If that is apparent, it is definitely time to replace the gas burners. More commonly, you will notice low areas of flame. If a visual inspection does not reveal any damage to the burners themselves, you may need to replace the regulator and hose that bring gas from the liquid propane tank to your grill. The regulator usually closes down over time so you will notice your grill heating up less and less. The good news is it’s an easy fix and definitely something we can get to you in a few days!


And if you have any questions at all, give us a call! We want to make sure your party is a success (but there is very little we can do the day before to help).
877-244-0737

Happy Fourth! -Grill Girl

Top 5 Grilling Gadgets for 2015

Grilling is not only a great way to cook your lunch and dinners, it’s also one of our country’s favorite ways to enjoy the summer months with friends.

I put together a list of my favorite newly added accessories to our website for this season. I like to call them gadgets because it makes me feel cooler. These items will make grilling even more fun and easier than ever!

LED Grill Light

A Grill Light!! It’s battery operated and comes with a base to clamp onto your grill. This means the uses for this light are extremely diverse. It has a flexible neck so you can bend it to shine a light in any direction. This is perfect for the grilling enthusiast, but also for anyone who loves to camp! Don’t keep yourself in the dark! Your food deserves better!

Meat Claws 

Have you seen these? They are basically over-sized, really sharp forks.  These are made of stainless steel, so you don’t have to worry about the rusting or getting gross after just a few uses. If you like to smoke meat, these are an absolute must for shredding that delicious pork, brisket or chicken once you’ve smoked it to perfection. We have a pair of these at home and I promise serving a smoked pork butt in our home is ten times easier now than it used to be.

Grill Griddle

This one will be a harder sell – but I promise, you will end up using it much more than you think you will! My favorite version of this is the double-sided cast iron griddle.  One side is a smooth cooking surface while the other has ridges if you want some sear marks. It probably won’t take up your entire grilling surface area when you place it in the grill. It allows you to get the flavor of the smoke on delicate things like fish and veggies or even buns while using the rest of your grilling area for your burgers, steak or chicken. I actually made pancakes on a grill using this! We also have a stainless version available if you prefer that!

Grill Wing Rack

If you’ve ever grilled wings on a gas or charcoal grill, I’m sure you know the frustration of that fatty chicken skin getting stuck to your grilling surface. Is there anything more frustrating?! That skin is supposed to get crispy and flavorful and just when you’ve achieved that, you flip the wing and the skin stays right there, stuck to the grid. I HATE that! As you can tell, this hits a nerve with me, but there is an easier way! Chicken wings should not be naked, people. Keep the skin on right? Try out this wing rack and let me know what you think!

Shish-Kebab Grilling Set

Finally, don’t you love shish-kebabs? It’s such a fun way to bring diversity into your grilling repertoire. Get those veggies and meat all grilled at the same time, flavoring each other as they cook. Yum! Here’s the annoying thing – they get stuck to the grilling surface too, or when you flip them, they flip back. If that wasn’t annoying enough, the metal skewer gets too hot to touch. How about this little folding metal set? It comes with 6 skewers, and holds them above your cooking grid so they can cook without getting stuck. The skewers sit in grooves so you can flip them and they stay put! When you’re done grilling, just fold the set up and put it away. It’s made of stainless steel and will be another piece that will last long into your grilling career.

So what is your favorite pick on this list? Do you have any of these items currently? I’d love to hear your feedback.

As always, Happy Grilling from the Grill Girl!

It’s Warm(ER)! Go Grill Something!

Hello fellow grill fanatics and welcome to the first warm breath of air in 2015! Was this weekend not beautiful!?

I cannot wait to get our grill back into working order for the Spring and Summer seasons! Did you know that right now is the best time to pull out your grill and check it for working parts?

Keep the grill you love in your backyard and out of the landfill this year by replacing the old parts instead of the whole grill! You will save money and, in many cases, end up with a grill that works better than ever!

Here’s your checklist for Grill Spring Cleaning:

  1. Remove cover (carefully) and make sure there are no bugs who used it as their cover over the winter! Don’t have a cover for your grill? You should definitely get one! Covering your grill will help it cook better for longer!
  2. Look on the back of the grill for a model number. This will help immensely as you look for replacement parts on the internet.
  3. Take the cooking grids off your grill and inspect them. Your grid could be cast iron, steel bar, or stainless steel and coated in a variety of things. It might be hard to determine any of that if you have rusting or other corrosion. Clean the grids with a Brass Bristled Brush. If you notice a large amount of rusting or any breakage, put them on your list to replace!
  4. Under the grids you’ll see some system that covers the actual flame of the grill burners. This could be metal heat plates, shields, angles, or another grate that holds briquettes. Drippings and the heat of normal grilling will cause these to discolor and corrode. Since your food doesn’t go on these directly, you don’t need to worry about rust. However, if your heat plates have large holes, are breaking or if your grates don’t hold up the briquettes, it’s time to replace those as well.
  5. Remove the heat plates or briquettes and you should be looking down on the burner system in your grill.  With the hood open, light your grill. The burners should each light up and produce a consistent blue flame all along the outside of the burner. If you have any extra large flames, yellow flames, or burners that don’t light fully, you should may need to replace the burners. Any large holes or major corrosion is cause to replace these pieces. If the burners look great, but you’re not getting enough flame, it could be your gas source, valve or regulator.

Call our customer service to help you today! If you can’t find your gas grill model number, measure the parts you need to replace. Our phone number is 877-244-0737.


And as always – Happy Grilling! –GG

Grilled Bacon

Have you ever been tempted to try your hand at bacon on the grill?

With the social sharing sites like Facebook, Pinterest and Twitter all loving the idea of bacon and loving the method of grilling, it’s a short jump to grilled bacon.

However, it’s definitely easier said than done!

When grilling a bacon wrapped burger goes wrong

Doesn’t a bacon wrapped burger, stuffed with cheddar cheese, grilled to perfection sound amazing?

It looks even better according to the “oh so easy” picture by picture instructions found on pinterest for this recipe. Aspiring for wife of the year, a pinterester found and attempted this recipe. It resulted in the above photo, along with a full blown grill fire, complete with singed eyebrows.

So should we toss in the grill tongs when it come to bacon on the barbie?

***If you like to play it safe, yes. Just do bacon wrapped stuff in the oven.***

If you’re set on the adventure, here are a few tips before you get started.

  • Do not grill bacon over open flame
    • heat the grill with one burner on low and place the bacon on the opposite side, using the indirect heat to cook it.
    • if using charcoal, wait until the flames die down and cook over a hot bed of coals.
  • Grill bacon on aluminum foil or over a pan so the grease is not dripping into the grill
  • Low and Slow is the way to Go
    • high heat is not your friend in this situation
  • Use a temperature gauge to check the internal temp of the food wrapped by bacon to ensure it’s cooked.
  • Make sure it’s easy to cut off fuel supply to your grill in case of fire.

Even taking these precautions, please remember that bacon is a very fatty food. Grilling it creates a high likelihood of your food and/or grill catching on fire.  Just be careful!

And feel free to share your triumphs OR failures with us [email protected]

Happy Grilling!
-GG

For more hilarious pinterest fails, see pinstrosity.blogspot.com